In your own time....

I have done this for those of you who like to train on your own. Sometimes even with our best intentions we simply can’t make our classes. But like I say “ give me lemons, and I’ll make you lemonade “ this is me helping you make lemonade.
If you just want to go to the work out, scroll down.
Or if want to get a better understanding about what’s going on in each move at a more detailed level continue to read on. I will do my best to teach you, how you can become better.
* What to focus on / What muscles are or should be working
* What to be mindful of / What muscle are trying to help but shouldn’t
Manny moves in Pilates can be done wrongly by using numerous muscles. But that doesn’t me we should. I sometimes refer to it as,
if I walk in to a gym and decided I want to do a biceps curl with 100kg. I would bend down, grab the dumbbell, from there nothing would happen... why?
Because I’m not strong enough. Nothing happens and no harm done. But say for instance I like to do a biceps curl with 10kg, well that’s doable, but will I be able to do a real biceps curl using only my biceps? Or will I swing back, use my lower back muscles and shoulder to help out??
This is when it’s down to quality rather then quantity.
Most of the time we are not even aware that we are doing it wrong, or what we are doing wrong. I like to tell my students where we are suppose to feel it, emphasis on the area and muscle group. Also I mention where one might feel it, but shouldn’t, so they can look out for that. What muscles will try to help you out so you can manage to complete the task. Problem is, you are not managing to complete the task if this is happening, the task is always to listen to the body. Not to switch which muscle is working.
In Pilates we are trying to teach our brain to only use the muscles we want to work with. This is easier said then done!
When people struggle or simply don’t succeed in a time frame they feel they would like to, they feel the reason is that they are not strong enough.
That can be the case, but often in my opinion it is a matter of not yet being able to get the communication between the brain and the muscle to work.
Here is a example that I often use:
|"Just the left? Just the right? No? Is it because you don’t have the muscle to do it? No, you just lifted both.
But for most of us to manage to lift one would mean we have to practice that in front of a mirror and be patient. Eventually we would teach our brain to simply use that specific muscle to lift one brow.
Pilates is like this in many ways. We are focusing and concentrating, teaching ourselves to be more aware of what the body is doing. Listening to our body.
Let me brake it down and give you an example
If I lay down on the floor, bend the knees and put my hands behind my head. Let’s prepare to do a crunch / sit-up.
This by the way, is by far the most common move the average person use to strengthen their abdominal, so why is someone that does this exercise not successful at strengthening their abdominals?
Answers: they are not working out their abs!
It looks like they do, but really are they?
What often happens is that they pull their neck, yanking it forward using their arms and hands, as leverage, doing this they more then likely are hoisting themselves forward, this puts a lot of strain on the vertebrae’s in the neck. Then they use that momentum that pull them forward to roll back again.
Ultimately the person doing this move are using, momentum, head, neck, shoulders and arms to get up in a crunch / sit-up position. Then they repeat this rocking and pulling move for a number of times or for a set amount of seconds / minutes.
Now be honest, if you have done this, did you feel pain in your lover back or neck?
At the end of the page I have listed a sequence of Joseph Pilates beginners move.
Many of these would be needed to be modified in the beginning until you strengthen up.
By saying that they belong in a beginners sequence, dose not mean that they are easy. It means that most of us should be able to do them, even if they might need to be modified.
The more advanced moves in Pilates does not necessarily mean that you need to be just stronger, as Pilates itself is not just about muscle strength. It’s means that the person that is ready for the more advanced moves has mastered a better control of the mind and body communication, they have better flexibility and length in their muscles, often in their legs and spine. They have mastered the breathing and core control. Making the advanced moves available and safe for them.
The moves are in a specific order, and this also has a reason, as certain moves prepares us for what’s coming next, getting the body ready. Lengthening and opening up our bodies.
So hence the sequence of a repertoire. We don’t do it the other way around because our bodies wouldn’t be ready, in many ways if we did. But this also gives us the opportunity to know what’s coming next, helping us to prepare and get our bodies and mind ready.
Nothing is done on a whim. It’s planned and prepared for. If your mind drift and you realize you are thinking about something else, go back to focus on your breathing. Big, deep and full breaths.
To truly get 100% out of your Pilates your mind should and could only be focused on what you are doing, and even that is a lot !
Tutorial
Moves for you to practice
Below I have given a classical sequence that is suitable for anyone without any injuries or physical conditions. I always recommend, that one first attends Pilates classes to gain experience with a qualified Pilates instructor before doing Pilates by themselves
All of these moves have modifications, but there are so many different types of modifications, depending on all the different types of injuries and conditions, that I can not list them all here.
Regarding repetition, it’s really individual, depending on your level of physical strength and ability. General rule, do as many as you can without compromising your form.
Sequence for all

HUNDREDTarget & where to feel it: Abdominals. Where not to feel it: Shoulders, Neck, lower back.
|
FOCUS: Maintain your lower back in the mat. Breath. Keeping a open chest. Pressing inner thighs together
AVOID: Shoulders lifting, chin tilting up. Legs or trunk moving |
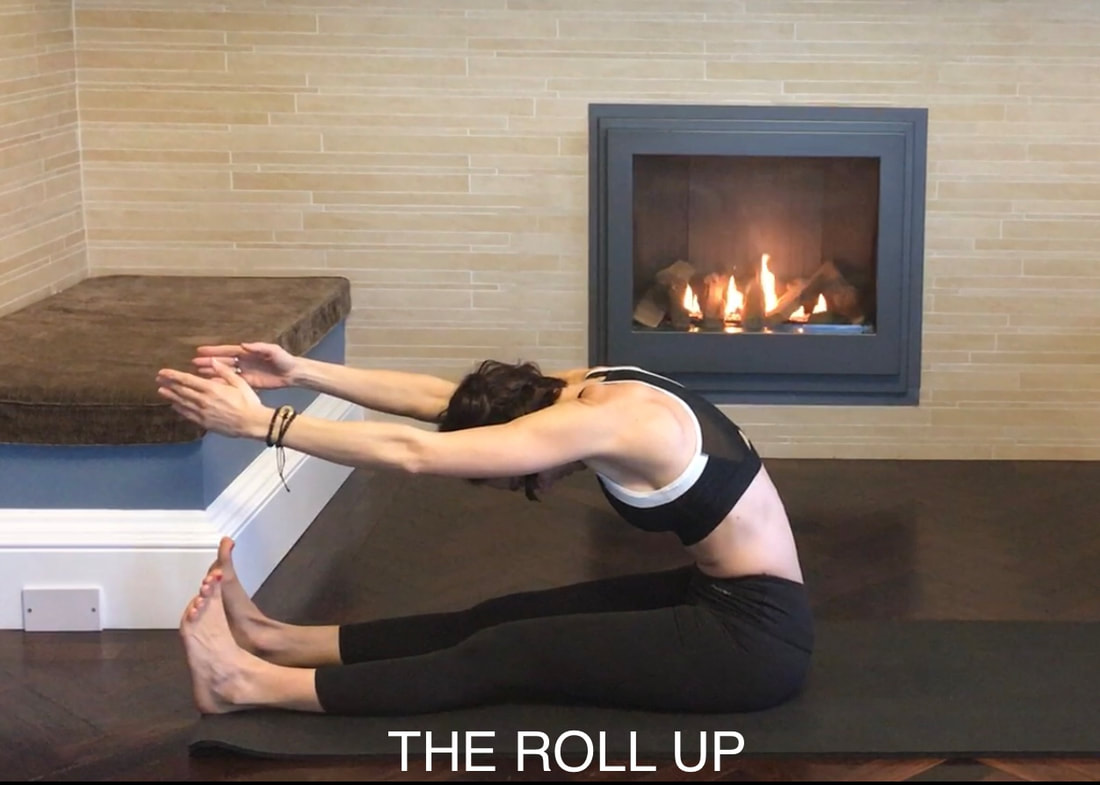
ROLL UP
Target & where to feel it: strengthens abdominals & mobilises the spine teaches scoop & control
Where not to feel it: Lower back.
Where not to feel it: Lower back.
- HOW:
- Lay down on the mat. Flex your feet that are fist distance apart.
- Lift your arms over head, mindful that when you do so your shoulders or rib cage don’t move.
- Keep your shoulders relaxed away from your ears. Chin tilted to your chest.
- Keeping your spine as long and straight and possible.
- Inhale to prepare through your nose and feel your rib cage expand.
- Exhale through your mouth and engage your core. Head and shoulders lifting of from the mat.
- Press your legs down on the mat. Peeling ones vertebrae at the time off from the mat.
- Scooping through the core. Rounding through the spine as you reach forward. Empty your lungs. Squeezing pelvic floor muscle.
- Reaching forward through the finger tips and heals, Shoulders relaxes away from your ears.
- Inhale fully through the nose as you sit up as you get taller. Exhaling as you tuck your pelvis under. Lowering back down to the floor one vertebrae at the time.
- Scooping all the way. As the arms reach back up and over squeeze pelvic floor muscles as the last bit of air leaves your lungs.
|
|
FOCUS: Feel one vertebrae at the time lifting and lowering of the mat
AVOID: Rushing. Hoisting forward. Lifting shoulders up. |
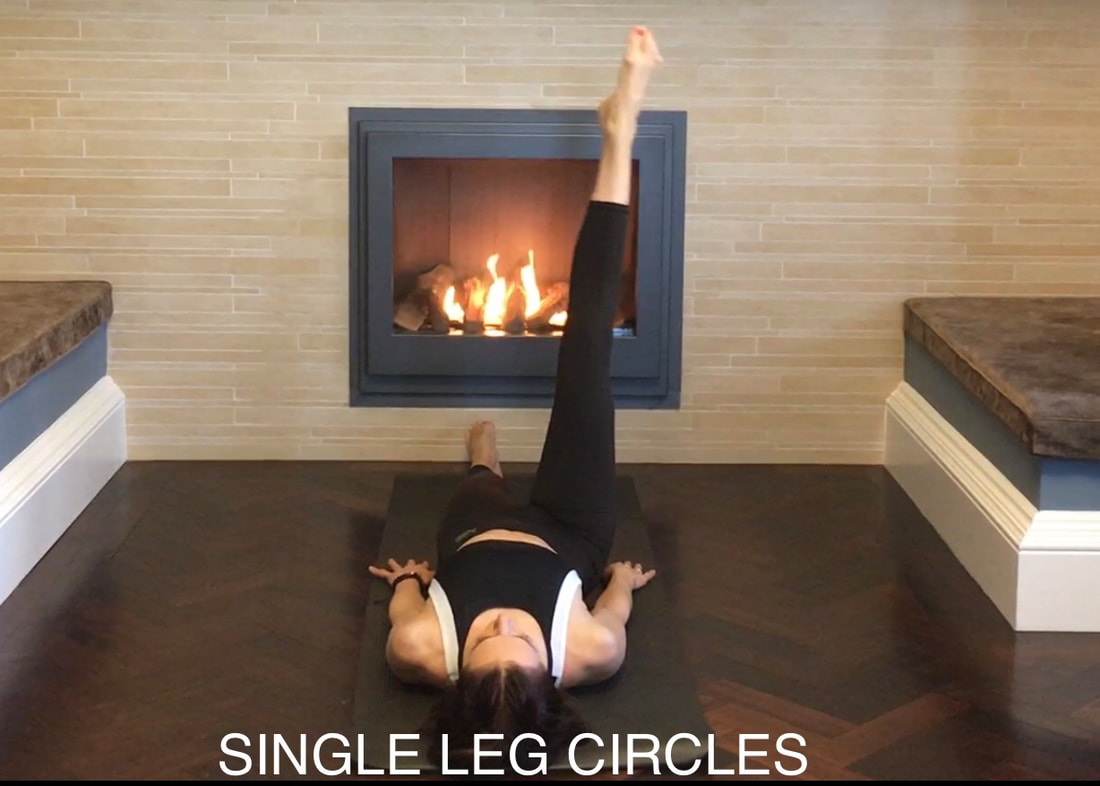
LEG CIRCLESTarget & where to feel it: Strengthen Abdominals & Hip flexors. Pelvic stability & Lengthens leg muscles
Where not to feel it: Lower back, neck & shoulders
|
FOCUS: Maintaining a completely still body as you, a reaching in opposition. AVOID: Lifting your shoulders, rocking side to side, tilting your chin up. |
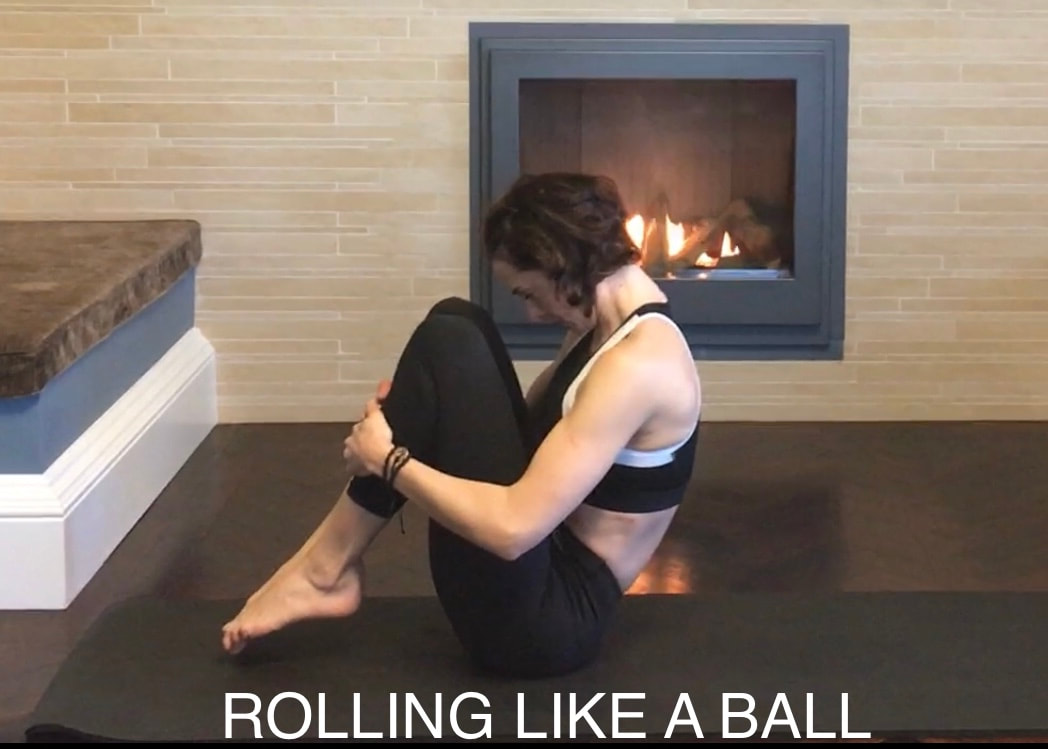
ROLLING LIKE A BALLTarget & where to feel it: Develops Balance & coordination, Core control, Pelvic stability, Increases Flexibility & articulation of the spine, Teaches Scooping
Where not to feel it: Neck
|
FOCUS: Massaging the spine. Balance & Relax
AVOID: Momentum, Rolling on to your shoulders, Never let your head touch the floor. |
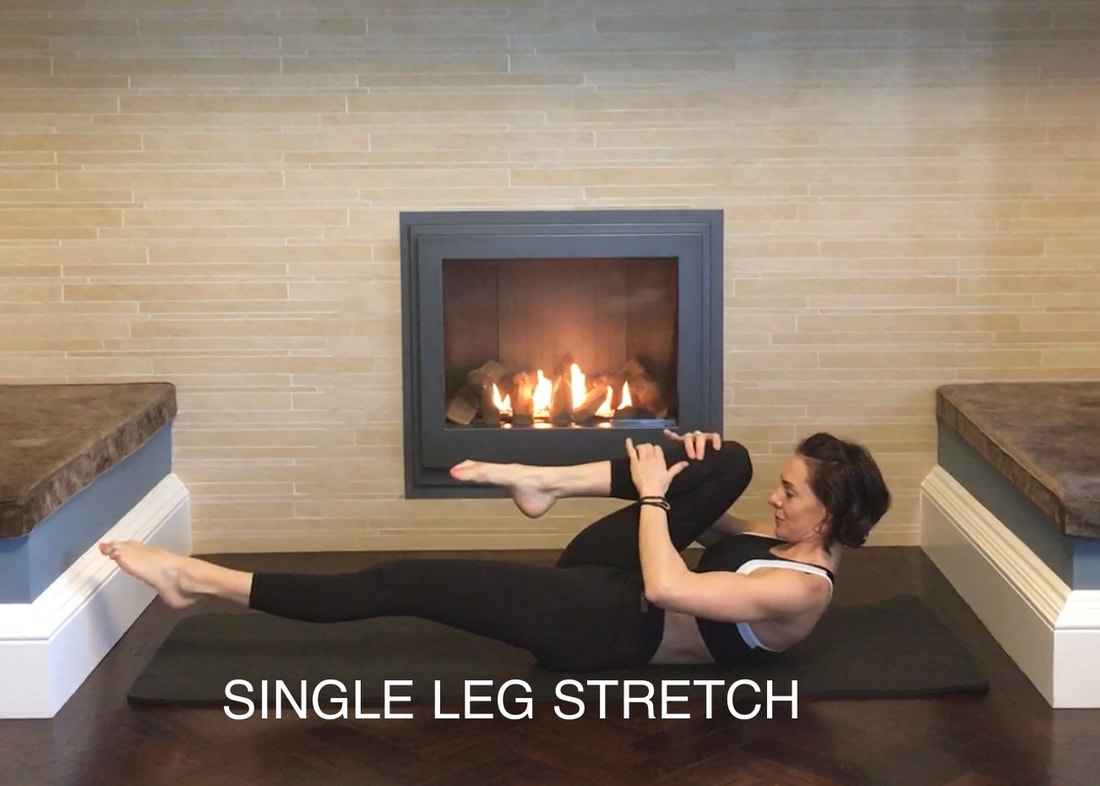
SINGLE LEG STRETCHTarget & where to feel it: Strengthen abdominals, Pelvic & torso stability
Where not to feel it: Head, Neck, Shoulders or lower back
|
FOCUS: Maintaining a still upper body and pelvis. Reach through the crown of your head and toes. Keep your ribcage as close to your public bone as possible.
AVOID: Rocking from side to side, creating a momentum. Lifting your shoulders. |
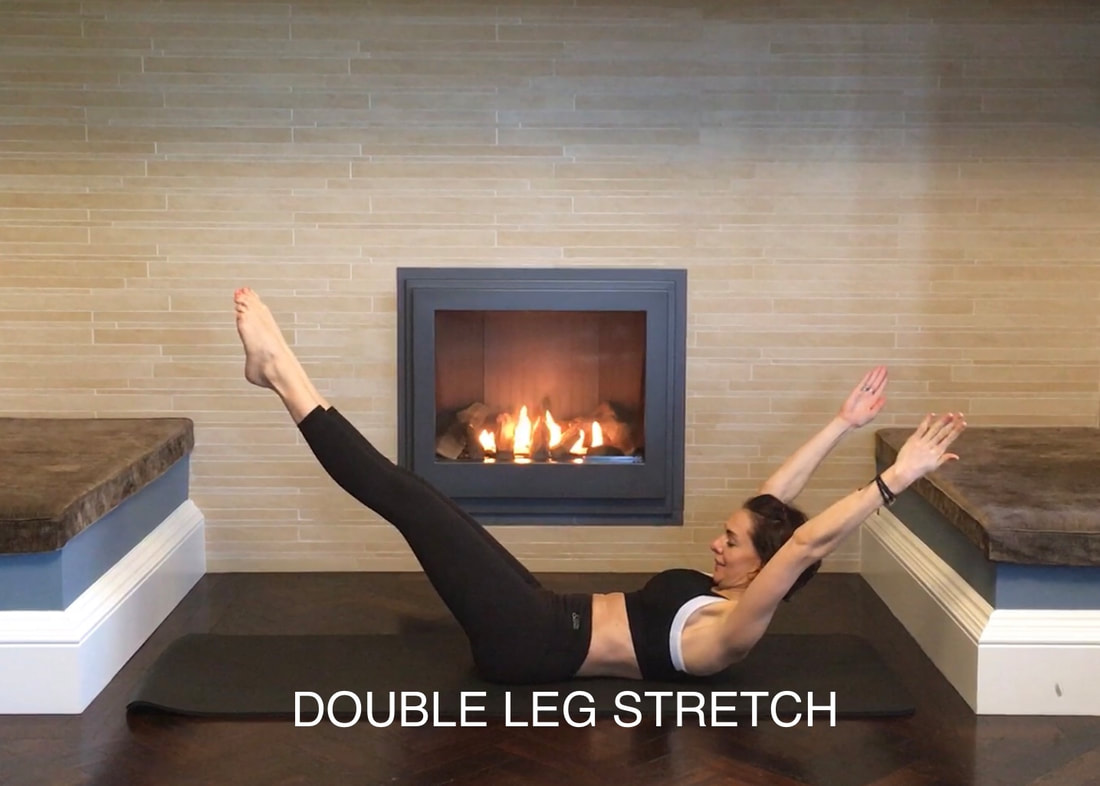
DOUBLE LEG STRETCHTarget & where to feel it: Strengthen abdominals, Pelvic & torso stability
Where not to feel it: Head, Neck, Shoulders or lower back
|
FOCUS: Still upper body, lower back connecting with the mat the entire time. Reaching from the crown of your head, pointed toes, fingertips.
AVOID: Lifting shoulders. Arching the back. Head dropping back. |
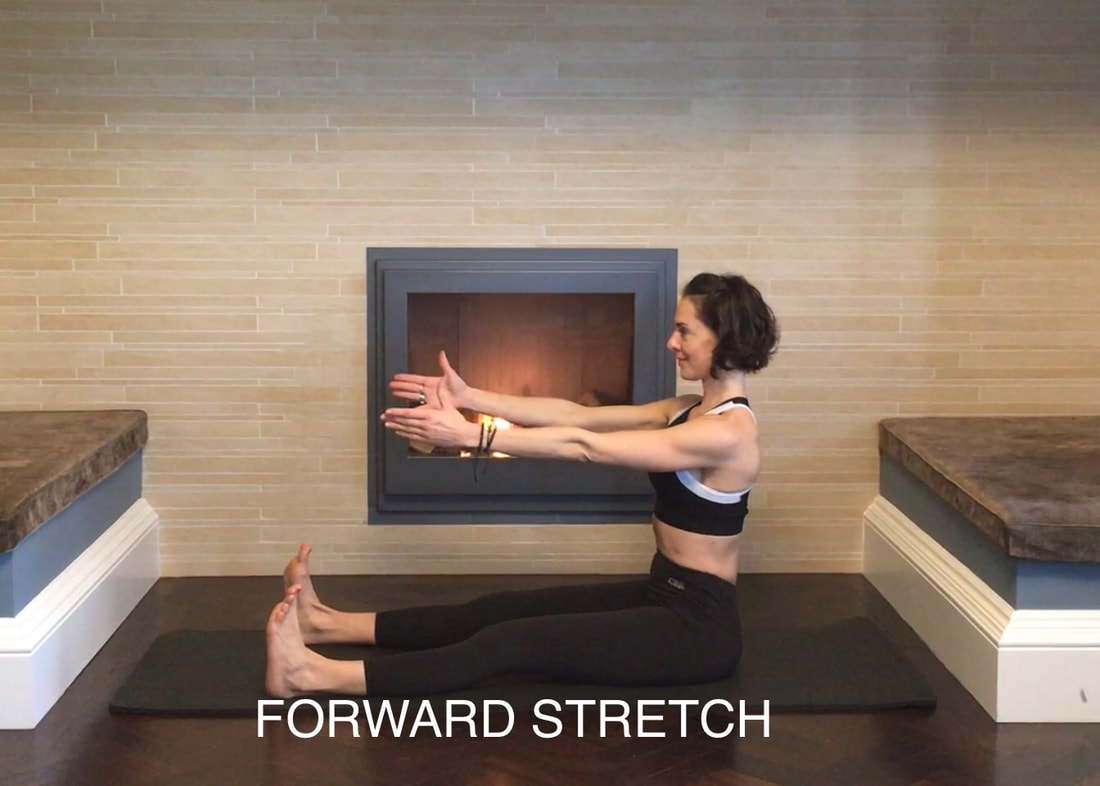
SPINE STRETCH FORWARD
|
Target & where to feel it: Teaching you body awareness, sitting tall, improving pelvic stability, stretches mid to upper back as well as your shoulders & hamstrings
Where not to feel it: Lower back & hip flexors
|
FOCUS: Feel your body, take your time. Slow big breaths. Be patient.
AVOID: Twisting your pelvis. Sitting hunched. |
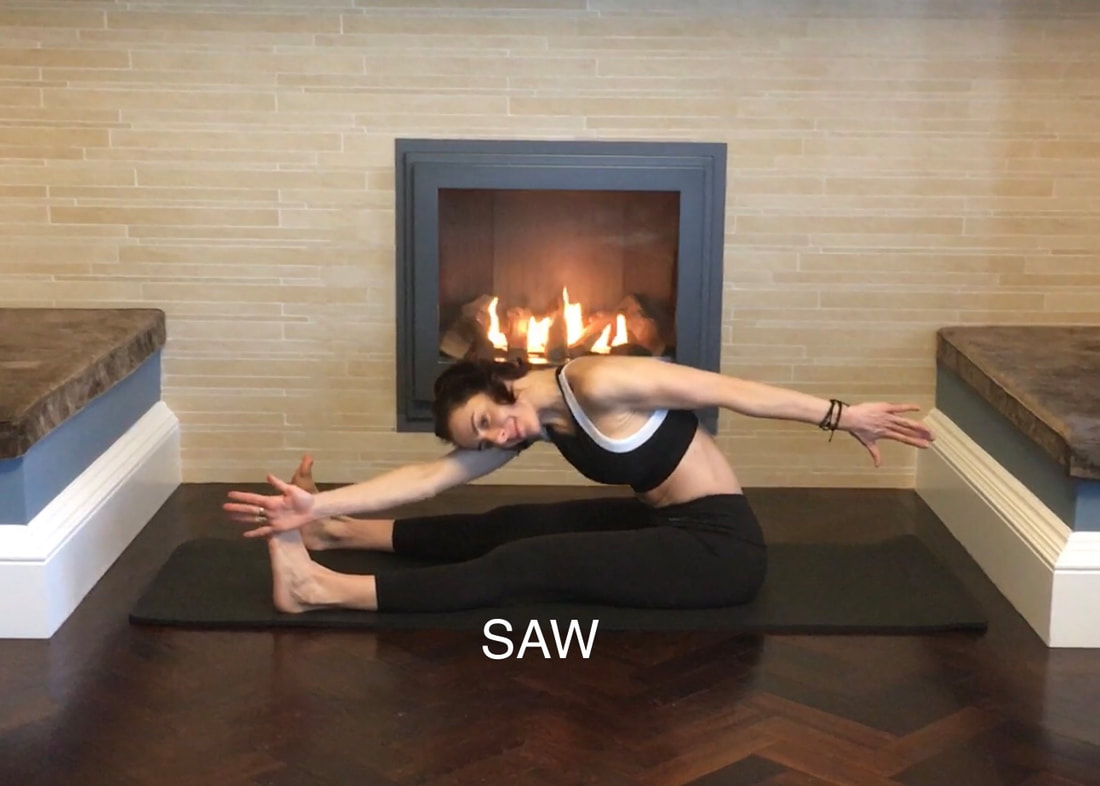
Saw
|
Target & where to feet it: Oblique muscles. Increases rotation in the spine & mobility of shoulder girdle. Teaching you body awareness, sitting tall, improving pelvic stability, stretches mid to upper back as well as your shoulders & hamstrings
Where not to feel it: Lower back and hip
|
FOCUS: Feeling even and balanced as you twist. Feel your body, take your time. Slow big breaths. Be patient.
AVOID: Twisting your pelvis. Sitting hunched. Butt or legs moving up and forward. |
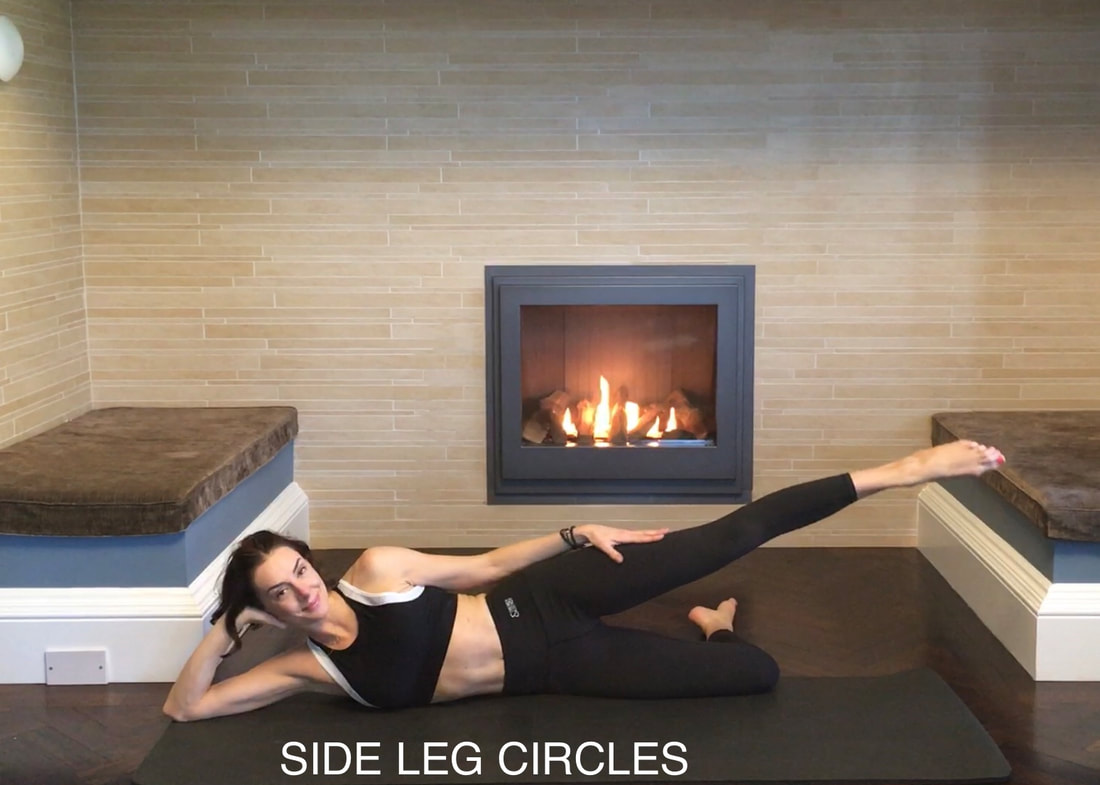
SIDE LEG KICKS
|
Target & where to feel it: Strengthening your hips, buttocks and outer thighs. Improving balance through core control.
Where not to feel it: Back & Shoulders
|
FOCUS: Having a straight spine, still upper body, reaching with your leg. Slow deep breaths, with core engagement.
AVOID: Sinking in to your waistline & shoulders. Knee rotating in. Rocking back and forth. |